Thursday, February 7, 2008

If Only I Had A Picture...

A nickel for every time I've said that and I'd have this resto paid for. A major detail of the main stairs was ripped out when the wall was built through the foyer to make apartments. The basic clues were on the bead board of the closet, a recently discovered marking on the newel post, and markings that I noted on the floor before they were sanded. Also talking to the grandchildren I verified that there was a built in bench here and that it did have a lid (where the toy stash was!). So now to come up with a design to make something close to original based on some vague clues. Checking the web for similiar arts & crafts influenced staircases with built in benches, I got some ideas for the end that I would need to build. Initially I was going to go with a full side, than a friend suggested that maybe it was more like a lower case "h" design - and that's what I went with. Kinda like a pew design.

First problem was to be able to copy the beadboard that was still there. Markings on the floor showed that more was used to form the bench. Well I found oak casing that was close, and all I did was run each side through the router to get the bead design.


To build an end for the bench that had the design showing on each side I glued these pieces back to back, ending up with about an 1 1/2inch thick board. The original board is tongue and groove, but my copy was just casing molding, so to build a panel I needed to use a biscuit joiner and connect all the pieces with biscuits and wood glue - then clamped for 24 hrs. What I ended up with was a nice end panel that was pretty close to the old bead board.


To finish off the vertical edges I ripped down a 1x piece of oak and attached to the bead board panel. Then using a small piece of stock trim, I added along the horizontal edges where a "handrail" piece will be added on top of each level.


With the side panel permanently attached, I then built a frame for the front of the bench out of 1x2 oak and mounted the same bead board trim to this frame. This completed the side and front sections.... now for the top. I used a 1x4 to fill in the back out even with the edge of the newel post. I used the same 1x4 for each end of the top as well. This left the bench with a nice opening to add a lid that would hinge open. I mounted support pieces inside to support this side trim. The lid will be supported by the hinges in the back and the front will rest on the front wall of the bench.


Now for a lid. I built the bench to fit a 15 inch deep lid - which would be built from two 1x8 oak boards biscuit joined together (7 1/2 inches wide each actually). This was a small scale practice run for when I have to reproduce the dining room window seat. Actually it's quite easy and after clamping for a day I had a pretty tight board which required just a little sanding to hide the joint. I then cut the lid to fit the opening and finally routered an edge bead to the entire front lip of the lid and ends to copy a detail from the window seat which is original to the house.


For the arm rests I tried a few designs, ending up with using a simple 1x3 oak and routering an ogee along the edges.


And here is the final result....


It's just mocked up for now. I need to run some cabling into the closet from under the stairs. Then I can add supports and line the inside of the bench to make a storage compartment. Finally I'll do the permanent install and add hinges to the lid. The design "feels" right so I think I got it close to what was originally there.

Sunday, February 3, 2008

Stair Strippin

I decided to start working on the staircase next. I'll finish everything but the treads until I get much of the heavy upstairs work done because of the heavy traffic they will still get. First order of business was finishing the baseboards in the closet which I used new quarter round for the toe piece and the same cap I bought for the rest of the downstairs minus the piece I made to back it. The originals had the same problem of white paint that had soaked in pretty good and would have distorted the design by the time I sanded it all off. Next was stripping all the beadboard that when installed forms the closet - talk about tedious stripping. I made a new bottom nailer trim piece for these that was pretty beat up. Then came the install and stain. Even the old timers made mistakes as I discovered, because they started nailing the pieces from the corner of the steps out and when they got to the last two pieces before the corner post for the closet door - they were going to have a 1/2 inch gap. So they used filler on the tongue of the second board in instead of it fitting into the next board. Well I decided to fix this a little better and used a small piece of trim to hide this gap and it works fine.


Next I added the toe piece for the bottom riser which bends a full 90 degrees into what will be the bench seat. I wish I could have bought some of the flexible trim that's available, but mine are custom so I could never get a match. I ended up installing the flat and then over two weeks keeping a damp cloth on the trim to soften it and slowly worked it around the corner. It didn't come out perfectly tight all around the riser but it looks ok.


I started working on the closet door which is also a real bear to get stripped. I think it was sanded down before the white paint was applied and has soaked in the wood a bit. It taked a heat gun for the top layers, then two coats of stripper for the bottom coat, and then a good going over with my sander. The biggest problem is the detail between the panels and the rails. Nothing but tedious stripping and hand sanding will fix that and I haven't got that far yet on it. I would replace the door since the bottom has been chopped shorter for carpeting... but finding a thinner style oak 5 panel door that hasn't been drilled for a lockset will be tough at best.


Now it's time to start stripping the side panels. These aren't to0 bad and at this point I have sections left. I also did one face of the main newel post. At this point the idea is to strip everything that surrounds the built in bench so that I can start replicating that. When I stripped the post I discovered a sillouete about 1 inch wide and about 40 inches tall. When working on a bench design in my head and what clues I have to go by I initially thought it would be open on the newel post end. The more I thought I just couldn't come up with a design that made sense to fit the cavity I had and how the stair was chopped.Then I started looking at pictures online and closer at my situation - and discovered that most had another full side to them. Then I noticed a slight line in my newel and after initial stripping it was even more evident because of how the white paint stubbornly attached to raw oak (this time was a plus). And some filled nail holes as well.


Stay tuned as I work on a design and replicate the missing bench (if only I had a picture to go by.....)

Tuesday, January 22, 2008

Jump Juke Jive'n

After two years of being in parts and pieces, I was finally able to get one of my favorite toys back together. It's a 1939 RockOla Light-Up Luxury Deluxe jukebox - and it still plays original 78's. This was one of my early EBAY finds about 10 years ago and I drove from PA all the way to Minnesota to get it. What an adventure that was! It's former life was in a night club somewhere in the middle of MN. So here it is all back together and proudly lit in it's new home in the foyer.


1939 RockOla

Someday..... when the house is done.....heh heh....... I will get to these two. The first is a sister to the restored RockOla - but it's a 1940 model needing full restoration. I'm still looking for a few parts for it. The other is about 80% done needing mostly some mechanical work and some cleaning from being moved and stored for the past few years. It's a 1936 Wurlitzer - made just before the "plastic" era started, this guy is all wood with just some colored lighting instead.


1940 RockOla

1936 Wurlitzer


A little Glenn Miller or Sinatra anyone?

Monday, January 21, 2008

Baseboards On A Budget

A good bit of thought went into finding a way to replicate the baseboards that originally were in the Hall house. Fortunately I found enough evidence to have a sample of what was - but duplicating it would not be that simple.... or cheap. They consist of a 1x6 oak board that is raised about an inch off the floor on block shims. The toe piece covers this gap and you end up with a full 7 inches of base before the cap is installed. The original toe piece was not your typical 1/4 round, but a stop moulding used in the door jambs. This piece is approx. 1/2 inch thick and 1 1/2 inches high. Finally the cap is a fairly complicated piece that overlaps the top of the base, protruding past the board a good 1/2 inch. The back has some relief cuts as well to help form to an uneven wall when being installed. This would be by far the hardest part to duplicate and most costly.


original cap and toe pieces

So I started out previously milling 1x6 oak boards and installed them a few months back. Next I work on the a solution for the toe piece. The closest stock lumber was a 1x2 oak that I would have had to rip in half, then rip shorter, then finally run on the router with an ogee bit to get the top profile - lots of work - and not very cheap either. I could also have made the piece from my lot of oak planks - adding even more work, but the cost would have been nothing but lots of time. Then it dawned on me that I had all the oak flooring I took up from the first floor that I had no idea what to do with. And these were already 1/2 inch x 2" - but after you take off the tongue and groove you're there. Plus I had these in up to 12 ft. lengths, so I could do some long runs in one piece.

So I went ahead running enough floor boards through the planer and then ripped the tongue (left the groove since it will sit against the floor), and then routered the ogee profile. In an afternoon I was able to make enough to do the three rooms downstairs and the staircase - and the cost was absolutely nothing. Plus I have plenty of flooring to make toe pieces for the entire house.


new 1x6 and toe piece

For the cap I convinced myself that I since I had no original capping in the house to match to (unlike the casing) it would be perfectly OK to use something close to the original if it was easier and cheaper - especially since nobody would ever no the difference but me. So I browsed the trim aisle and found the usual base capping, but nothing else. So I bought a piece and figured I'd see if it would look good enough to use. Unfortunately when placed on top of the true 1x6, the scaling was all wrong - since these are made really to be on top of a 3/4 board. So back to the drawing board.

what's wrong with this picture?

I though I might be back to milling the original, then my buddy John said try shimming out with another piece of moulding - after all lots of mouldings are made from several pieces in ornate woodwork. To make things look right, I needed to come out about 1/2 inch and maybe another 1/2 taller. Hmmm - my flooring stock is 1/2 inch thick..... so I grabbed a scrap of toe piece I made and placed it behind the cap I bought and things started to look much better.


on the right track...

At first I thought this is it.... but after looking at the cap for awhile the 90 degree angle at the joint between the two pieces just didn't look right. The profile should flow smoother than that. Then playing with the two pieces some, I shifted the front piece up until it was even with the beginning of the curve of the ogee on the toe piece. Now everything look right. I just needed to rip the toe piece down so it was shorter and the pieces lined up like this. Problem solved!

the solution

So back to the shop to make another run of toe pieces, this time shorter, to complete the cap. The front piece cost about 90 cents/ foot at HD. With the cost of the 1x6 at about $1.00/foot since I made them myself from rough oak boards - at the grand total of under $2.00/foot I have solid oak 8 inch high baseboards, that are a close enough match to original that I'm satisfied I did the house good.

not bad, eh?

Sunday, January 13, 2008

Shiny Happy Floors

Well the guys at Shamrock Floor put on the 3 coats of poly (2 gloss - 1 top coat satin), and they had a week to dry. We are very pleased with how they came out and the downstairs looks like a different house. We can start putting furniture on, but have to wait a month for rugs. In the meantime I went ahead and finished the baseboard work while the furniture was out. I came up with a solution to replicate the original base trim that came close to original but cost me only $1.00/ foot using a stock piece from HD and milling some pieces from the oak flooring I took up. I'll show you how this was done in the next post. But here you can see some shots of the finished floors with the base assembled and stained. I like the contrast of the darker oak and the lighter pine. We can finally use some of the downstairs now and it's time to get the jukebox parts from the basement and put that beast back together for the foyer.


Sunday, January 6, 2008

The Floor Sanders Finally Cometh

Finally - the floors are getting done. I thought this day would never come.... and of course when it did, it would be the coldest days we've had this season. Hell - throw up all the windows, the oil only cost me $3.50/gallon. But at this point I didn't care, I just want them done.

I was a little hesitant to finally pass on my first project to an outsider, but after watching the two of them drag that beast of a sander in the house... and then seeing about 5 minutes of them man-handling it - I was sold - they can have that job. After an hour or so into it they remarked that this was one of the worst floors they encountered in awhile! When the floor guys who do this everyday can say that, I 'm definitely glad I didn't tackle it myself. So they had to start with 20 grit paper to strip all the grime and faux paint finish that was on. Followed by 36. Then they had to counter sink all the nails that were put into the floor - no, of course whoever put them there didn't use finish nails. So this just added to the problems with the floors. In the end it took them a day and a half to sand the three rooms, which was longer than they anticipated. But in the end they did a hell of a job and brought them back as good as I could have hoped. Now just three coats of poly.

These picks are after the rough sanding was finished and spot filler done. The next morning was the finish sanding.


Sunday, December 30, 2007

Swing In - Swing Out

In prep for the floors getting refinished, to let us in and keep the cats out, I decided to install the swinging door between the kitchen and dining room. There was no door there, but the signs there once was could be noticed in the jamb. Two setups used to be found - one with double action spring hinges, and another that swung on pins located in the top jamb and floor with a spring built into the floor pin/bracket assembly. It looked like mine was the double action spring due to no wood was removed to mount any pin assemblies and that the ghost of a single stop moulding was seen on one side that would shim out the spring hinges. Plus a good deal of holes in two locations where hinges would have been.

So back to good ol' EBAY I found an original pair of double action hinges and at a good price - keep in mind these are the rarer of the two setups. They are quite impressive at about 2 pounds a piece! The hinges are marked Brommers and latest patent date is 1896.

So first I sanded down the jamb in prep for a shim strip which I made from the oak flooring I removed to expose the original floor. Next with some help from Rach I mounted the hinges to the strip. This is quite an act since these guys want to spring shut and you need to keep it open to expose the mounting holes.

double-action hinge in closed position


With hinge side complete, now there was the story of coming up with a door. Originally the whole house was 5 panel oak - but now only 3 oak doors remain, and only one that would fit this spot. The rest of my salvaged doors are all pine, and downstairs will be all stained oak - so the only solution was taking the oak door I found between the two front bedrooms that was walled over. This I will replace with a pine door which will keep the upstairs consistent.


double-action hinge in open position, door pivots off opposite pin for other direction

So after some minor trimming to get the size just right, Rach again helped hold things while I pried the other side of the hinge open and mounted the door to the hinges. A little more tuning and the door works great. Now it was time to strip all the white paint off and expose the oak graining as it was meant to be.


Now just needs some finish sanding, stain and poly, and eventually do the kitchen side which will remain white to match the kitchen scheme.

Saturday, December 29, 2007

Check Off Another Project

After probably 100+ hours of stripping, scraping, sanding, and refabbing - the divider between the foyer and parlor is 99% done. This truly is one of the centerpieces of the foyer and happy to report that it cleaned up really well. There is some gorgeous graining in the oak and once again I can't believe why someone would paint over this. There were 4 pieces of trim missing, one on each side of the vertical 2 foot jambs that you pass through that cover the seam where this meets wall. I ended up using the stop moulding from the window seat that I had to replace with thicker. After some study this looked to be the best candidate for that spot and consistent with how the moulding was constructed through the house (what's left anyway!). I did have to plane it a tad thinner so it would meet flush with the crown running under the shelf ledge. Only item left is some trim at the base and top of the columns that need to be finished and installed.


Friday, December 21, 2007

Long Time No Blog

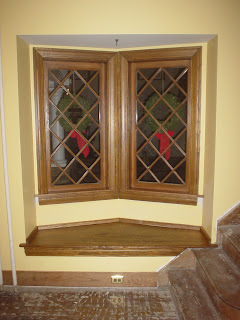
Things are still slow here at the old Hall house. Waiting for the floor guy who starts on the 2nd has left me in a work limbo. In the meantime I have started with finishing off some wood work. At this point I finished the window seat and bay windows in the foyer. I had to mill some thicker trim along the seat, since the new walls are slightly back further than original leaving a larger gap between the seat and walls. This also had to be done for the picture shelf above the landing window on the stairs. This section is also finished. I've been using Minwax "Aged Oak" in a gel stain and 2 coats of satin poly.


Next I started working on the columned room divider between the foyer and parlor. This should take a good week to complete. I could spend months with a dental pick trying to get all the paint out of the pores in the oak. At a certain point you just have to step back and say 'can't see anything from a few feet back - close enough!'

I don't recall if I mentioned finding Norris's Wilmington, DE warehouse - literally right across the street from one of the generation units I work on - but on closer inspection you can actually see his "L. Norris Hall" lettering faded under the lettering of the present occupants. I'll take some pics when I get down there again.

I managed to get lights up for the season outside which required installing three outlets around the porch. I installed this circuit through a timer installed next to the service panel that will fire up the outlets (and lights of course) automatically. During the rest of the year I can take out the timer tabs and just leave the switch on so the outlets are powered 24/7. I like this single heavy duty timer setup much better than plugging in a bunch of plug in timers in the outlets, and all the light come on at the same time. The other timer does the porch light.


.... and as for the new wood stove - the furry inspector finds it working to his satisfaction (and is healing up just fine)


Friday, December 7, 2007

I Can See For Miles....

And I'll never go up there again for that view!! That was by far the scariest job I ever had to do working up on top of the hip roof - and this coming from someone who skydived out of a plane....
Even with my fall gear from work on and a rope tied from chimney to scaffold, I just could not get any real sense that I was secured and really I wasn't. It's the journey that really was bad -up the scaffold, then up the ladder, and finally worked my way up the dormer valley and finally sitting on top of the dormer. The view was pretty good, but honestly I didn't look much!


So up top all I needed to do was secure the flashing down and tuck under the shingles. Then add the weather guard and finally seal the nail head and guard with high temp sealant. The next day was a good test for leaks and passed with flying colors. After two years of thinkin and sweatin about his project I can finally call it done. So finally when the weather clears I can break down the scaffold setup. I can say now that this job has re-thunk my plans for the dormers.... maybe vinyl ain't so bad all the way up there. Going up there to paint every few years doesn't seem so easy now!


In other news, I have a new floor dude and he is scheduled to start January 2nd. So will have to wait a few more weeks and decorating inside is definitely out this x-mas. We'll make up for it next year. With the first floor already cleared out for the sanding, I'll just work on detail stripping that needs to be done on some original woodwork and maybe get some of that stained/finished. Hopefully around middle of January when I can get everything out of the kitchen, then I can start the final push on getting that and the powder room "finished".

Saturday, December 1, 2007

Fire In The Hole

Finally I was able to punch through the roof and add the final section of chimney. After a few test fits to get the necessary clearances, I actually was able to stand through the hole (wish I had a pic of that!), then pull the flashing piece up by rope. Pushing the pipe and rain cap through to the outside, I slid the flashing on and then reconnected the pipe inside. I had to attach the cap now since I would have a tough time reaching it after the pipe is installed. The object here has been to get as much of the installation work done as possible from the the attic space, and do as little as possible up on the roof - cause only will get the guts to go up there once! At this point the only job left to do is secure the flashing and add the flashing weather guard.


At this point I technically was able to fire up the stove - and it was chilly - so what the heck. I was happy to see that I almost instantly had a good draft, a benefit of running the pipe though the house. Once fired up, I checked for smoke and heat spots. Happy to say no leaks. I was surprised that once at operating temp, that the pipe is very hot to touch, but yet at 2 inches away not much heat at all is felt. So I guess this is how they get away with only 2 inches of clearance in boxing in the pipe. You still get heat transfer to the air though, and it did warm up the rooms upstairs that it passes through - so when I do cover up the pipe, I'll add vents up top to get some of this heat. Today I'll get some nerve up and get things finished on the roof and take some outside pics.


The floor guy is MIA, so I'm looking for another refinisher. Any local recommendations from anyone????

Saturday, November 24, 2007

Snowy Days Ahead

Not much to report, last week of mega hours at work. Poor old Bogie had another bout with FUS which put a nice hit in the house funds....but oh well, he's doing good at least. Floors are scheduled to get done this week, and chimney I hope to finish next weekend. I built the scaffolding on turkey day morning. A grandson of Norris's sister (Bertha) contacted me today, having stumbled upon this site! Hopefully this part of the family may have some hidden goodies to share.... we'll see. Feels like time to dust off the snow blower again. I'll leave you with a photo of Hall house winter's past......


Hall children in front yard - about 1920

Saturday, November 10, 2007

The Last Light Fixture

I'm finally finished restoring the last of the brass light fixtures for the first floor. This dining room was the biggie and I definitely put in a few hours on this one, but it was worth the effort. It's an original gas/electric that is the centerpiece of the room.


Also x-mas came early this year and the 37" LCD flat screen is installed in the parlor. Due to the height of the screen I had to rearrange the seating a bit, but now are ready to kick back by the fire and watch "This Old House" in hi def.....


The 70 hour work week continues so this is all I got accomplished - 2 weeks till floors get done!

Friday, November 2, 2007

Buffin Brass

Not much progress lately while working 10hr days 7 days a week. Next day off will be Thanksgiving then back to normal again. I've been working on the dining room chandelier each evening and it's just about ready to be assembled. I got smart and borrowed my dad's buffing stand which he uses for restoring stainless trim on old cars. I found brass compound which is a bit softer than stainless and it worked really well - and much much faster than by hand.


Also got an estimate for having the floors sanded and finished downstairs. The estimate was too good to pass up, especially with my limited time this fall, so they will be getting done the week after Thanksgiving. This will be the first project farmed out to a contractor in the two years working on the Hall house. The floors need some serious sanding and I figure the most visible rooms in the house is not the place to learn how to use a drum sander!


The chimney is getting real close to poking through the roof, just waiting for some days off to finish.


18 inches to go...