Sunday, December 30, 2007

Swing In - Swing Out

In prep for the floors getting refinished, to let us in and keep the cats out, I decided to install the swinging door between the kitchen and dining room. There was no door there, but the signs there once was could be noticed in the jamb. Two setups used to be found - one with double action spring hinges, and another that swung on pins located in the top jamb and floor with a spring built into the floor pin/bracket assembly. It looked like mine was the double action spring due to no wood was removed to mount any pin assemblies and that the ghost of a single stop moulding was seen on one side that would shim out the spring hinges. Plus a good deal of holes in two locations where hinges would have been.

So back to good ol' EBAY I found an original pair of double action hinges and at a good price - keep in mind these are the rarer of the two setups. They are quite impressive at about 2 pounds a piece! The hinges are marked Brommers and latest patent date is 1896.

So first I sanded down the jamb in prep for a shim strip which I made from the oak flooring I removed to expose the original floor. Next with some help from Rach I mounted the hinges to the strip. This is quite an act since these guys want to spring shut and you need to keep it open to expose the mounting holes.

double-action hinge in closed position


With hinge side complete, now there was the story of coming up with a door. Originally the whole house was 5 panel oak - but now only 3 oak doors remain, and only one that would fit this spot. The rest of my salvaged doors are all pine, and downstairs will be all stained oak - so the only solution was taking the oak door I found between the two front bedrooms that was walled over. This I will replace with a pine door which will keep the upstairs consistent.


double-action hinge in open position, door pivots off opposite pin for other direction

So after some minor trimming to get the size just right, Rach again helped hold things while I pried the other side of the hinge open and mounted the door to the hinges. A little more tuning and the door works great. Now it was time to strip all the white paint off and expose the oak graining as it was meant to be.


Now just needs some finish sanding, stain and poly, and eventually do the kitchen side which will remain white to match the kitchen scheme.

Saturday, December 29, 2007

Check Off Another Project

After probably 100+ hours of stripping, scraping, sanding, and refabbing - the divider between the foyer and parlor is 99% done. This truly is one of the centerpieces of the foyer and happy to report that it cleaned up really well. There is some gorgeous graining in the oak and once again I can't believe why someone would paint over this. There were 4 pieces of trim missing, one on each side of the vertical 2 foot jambs that you pass through that cover the seam where this meets wall. I ended up using the stop moulding from the window seat that I had to replace with thicker. After some study this looked to be the best candidate for that spot and consistent with how the moulding was constructed through the house (what's left anyway!). I did have to plane it a tad thinner so it would meet flush with the crown running under the shelf ledge. Only item left is some trim at the base and top of the columns that need to be finished and installed.


Friday, December 21, 2007

Long Time No Blog

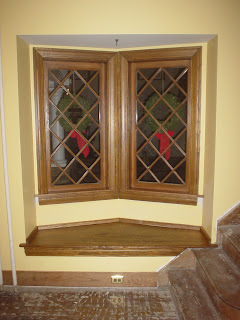
Things are still slow here at the old Hall house. Waiting for the floor guy who starts on the 2nd has left me in a work limbo. In the meantime I have started with finishing off some wood work. At this point I finished the window seat and bay windows in the foyer. I had to mill some thicker trim along the seat, since the new walls are slightly back further than original leaving a larger gap between the seat and walls. This also had to be done for the picture shelf above the landing window on the stairs. This section is also finished. I've been using Minwax "Aged Oak" in a gel stain and 2 coats of satin poly.


Next I started working on the columned room divider between the foyer and parlor. This should take a good week to complete. I could spend months with a dental pick trying to get all the paint out of the pores in the oak. At a certain point you just have to step back and say 'can't see anything from a few feet back - close enough!'

I don't recall if I mentioned finding Norris's Wilmington, DE warehouse - literally right across the street from one of the generation units I work on - but on closer inspection you can actually see his "L. Norris Hall" lettering faded under the lettering of the present occupants. I'll take some pics when I get down there again.

I managed to get lights up for the season outside which required installing three outlets around the porch. I installed this circuit through a timer installed next to the service panel that will fire up the outlets (and lights of course) automatically. During the rest of the year I can take out the timer tabs and just leave the switch on so the outlets are powered 24/7. I like this single heavy duty timer setup much better than plugging in a bunch of plug in timers in the outlets, and all the light come on at the same time. The other timer does the porch light.


.... and as for the new wood stove - the furry inspector finds it working to his satisfaction (and is healing up just fine)


Friday, December 7, 2007

I Can See For Miles....

And I'll never go up there again for that view!! That was by far the scariest job I ever had to do working up on top of the hip roof - and this coming from someone who skydived out of a plane....
Even with my fall gear from work on and a rope tied from chimney to scaffold, I just could not get any real sense that I was secured and really I wasn't. It's the journey that really was bad -up the scaffold, then up the ladder, and finally worked my way up the dormer valley and finally sitting on top of the dormer. The view was pretty good, but honestly I didn't look much!


So up top all I needed to do was secure the flashing down and tuck under the shingles. Then add the weather guard and finally seal the nail head and guard with high temp sealant. The next day was a good test for leaks and passed with flying colors. After two years of thinkin and sweatin about his project I can finally call it done. So finally when the weather clears I can break down the scaffold setup. I can say now that this job has re-thunk my plans for the dormers.... maybe vinyl ain't so bad all the way up there. Going up there to paint every few years doesn't seem so easy now!


In other news, I have a new floor dude and he is scheduled to start January 2nd. So will have to wait a few more weeks and decorating inside is definitely out this x-mas. We'll make up for it next year. With the first floor already cleared out for the sanding, I'll just work on detail stripping that needs to be done on some original woodwork and maybe get some of that stained/finished. Hopefully around middle of January when I can get everything out of the kitchen, then I can start the final push on getting that and the powder room "finished".

Saturday, December 1, 2007

Fire In The Hole

Finally I was able to punch through the roof and add the final section of chimney. After a few test fits to get the necessary clearances, I actually was able to stand through the hole (wish I had a pic of that!), then pull the flashing piece up by rope. Pushing the pipe and rain cap through to the outside, I slid the flashing on and then reconnected the pipe inside. I had to attach the cap now since I would have a tough time reaching it after the pipe is installed. The object here has been to get as much of the installation work done as possible from the the attic space, and do as little as possible up on the roof - cause only will get the guts to go up there once! At this point the only job left to do is secure the flashing and add the flashing weather guard.


At this point I technically was able to fire up the stove - and it was chilly - so what the heck. I was happy to see that I almost instantly had a good draft, a benefit of running the pipe though the house. Once fired up, I checked for smoke and heat spots. Happy to say no leaks. I was surprised that once at operating temp, that the pipe is very hot to touch, but yet at 2 inches away not much heat at all is felt. So I guess this is how they get away with only 2 inches of clearance in boxing in the pipe. You still get heat transfer to the air though, and it did warm up the rooms upstairs that it passes through - so when I do cover up the pipe, I'll add vents up top to get some of this heat. Today I'll get some nerve up and get things finished on the roof and take some outside pics.


The floor guy is MIA, so I'm looking for another refinisher. Any local recommendations from anyone????

Saturday, November 24, 2007

Snowy Days Ahead

Not much to report, last week of mega hours at work. Poor old Bogie had another bout with FUS which put a nice hit in the house funds....but oh well, he's doing good at least. Floors are scheduled to get done this week, and chimney I hope to finish next weekend. I built the scaffolding on turkey day morning. A grandson of Norris's sister (Bertha) contacted me today, having stumbled upon this site! Hopefully this part of the family may have some hidden goodies to share.... we'll see. Feels like time to dust off the snow blower again. I'll leave you with a photo of Hall house winter's past......


Hall children in front yard - about 1920

Saturday, November 10, 2007

The Last Light Fixture

I'm finally finished restoring the last of the brass light fixtures for the first floor. This dining room was the biggie and I definitely put in a few hours on this one, but it was worth the effort. It's an original gas/electric that is the centerpiece of the room.


Also x-mas came early this year and the 37" LCD flat screen is installed in the parlor. Due to the height of the screen I had to rearrange the seating a bit, but now are ready to kick back by the fire and watch "This Old House" in hi def.....


The 70 hour work week continues so this is all I got accomplished - 2 weeks till floors get done!

Friday, November 2, 2007

Buffin Brass

Not much progress lately while working 10hr days 7 days a week. Next day off will be Thanksgiving then back to normal again. I've been working on the dining room chandelier each evening and it's just about ready to be assembled. I got smart and borrowed my dad's buffing stand which he uses for restoring stainless trim on old cars. I found brass compound which is a bit softer than stainless and it worked really well - and much much faster than by hand.


Also got an estimate for having the floors sanded and finished downstairs. The estimate was too good to pass up, especially with my limited time this fall, so they will be getting done the week after Thanksgiving. This will be the first project farmed out to a contractor in the two years working on the Hall house. The floors need some serious sanding and I figure the most visible rooms in the house is not the place to learn how to use a drum sander!


The chimney is getting real close to poking through the roof, just waiting for some days off to finish.


18 inches to go...

Tuesday, October 23, 2007

Kitchen Stove Upgrade

When I first bought the house one of the first purchases was a 1936 Magic Chef gas stove for the kitchen. From there ended up going for a full retro 1930's kitchen. However the oven in this was kinda small and having to light with matches would get old.

So made a slight upgrade and found an early 1950's Magic Chef electric stove. This baby came from it's original home and everything still works. Has plenty of gadgets, including one burner that doubles as a deep well pot. The oven is larger and probably more accurate on temp as well. It's in great shape and even came with the original manual. So even though a little newer than the first plan - it's still plenty retro and will fit in great with the kitchen plan and be a bit more user friendly.


Sunday, October 21, 2007

Prepping For A Floor Sanding

I've been knocking down the list of items needing attention before the floors finally get sanded. Who or when they will is still being debated. I'd rather do myself, but time is very limited until after Thanksgiving when it will be a bit chilly to open the house for a bunch of days. I have someone recommended by several people so I will probably have him take a look and price just a sand job and sanding/finishing. I solved the mystery of the oak floor on top of the original flooring - apparently the original floor is yellow pine, not oak, and at some point was faux painted to look like a stained red oak. It was hard to tell through the grime and paper until I started stripping a spot to see how stubborn the finish was going to be to remove. So I guess at some point the Hall's opted to make their pine floors look more upscale and had them painted to look like oak - then later still went with the real deal. This paint puts a wrench in the whole floor plan I think cause I may have to strip them with a heat gun or stripper to get the paint off before they can be sanded - another reason I may have the "expert" over to give me an idea of what needs to be done.

So first item to do was patching a section of flooring that had several holes drilled through in the foyer. This was where the wall was added to divide the house up and wires were run. I saved pretty much all usable flooring when it was removed in the back, and fortunately a section that was in the old back porch floor was a perfect match. So I cut a piece that would replace the bad section, then laid it on the floor and scribed lines. This gave me an exact measurement to cut out and fit the replacement piece. I then chiseled where I scribed and used a saw to cut the old section out. After cleaning up the removed section and removing the tongues on the replacement and the existing floor I was able to lay the new piece in. It fit like a glove and the ends were over joists, so just nailed the ends and forget about it.


fits like a glove


The other big project was removing the radiators once again so I could do finish work on the walls, mount baseboards, etc. where I couldn't get to. Also I needed to plug some holes from when the smaller radiators replaced the originals leaving lots of holes when I went back to orginal sizes again. These holes are in the radiator floor boards or pedestals (not sure what you would call these since I've never seen a house with them). The plugs came out so so and I sanded two of the three down some, but in the end they really were pretty much shot - holes, splits, stains, etc. So then I got smart and figured if I could come up with some material I'd make new ones.... and that's exactly what I did.


good luck fixing this!

There were two 12" yellow pine planks about 7 ft. long being used as original shelving in the 3rd floor closet. This closet will house the AC unit so these were coming down anyway. The third board came from the garage when I cleaned up the roof supports. A few runs in the planer, added the 45 degree edge with the jointer, drilled holes where I needed them and finally a coat of poly. As good as original and technically original wood too!


And here they are in their new homes......

foyer

dining room

parlor

Notice the little "L" piece coming off the parlor base encasing the two pipes that feed the second floor. This piece was long gone but the silhouette was in the floor, so I made this as well. Also I stripped the floor around the bases a few inches so when the floors are sanded the machine won't have a hard time trying to get these edges cleaned up - and there was a lot of crud and paint along here.

Sunday, October 14, 2007

Baseboards Finished..... Almost

The baseboards are all mounted and stained now in the parlor, foyer, dining room, and staircase - needing only the toe piece and the caps. I cut and installed all the receptacles in the baseboards so can soon fire them up too. Check out the pics....


Boards are rough cut for each room ready to be milled

Foyer

Staircase Landing

Dining Room (note original curved section still in place)

Parlor

Saturday, October 13, 2007

Bending Baseboard

I've been in the process of milling and installing 1x6 oak boards for the downstairs baseboards that were ripped out long ago. Fortunately there was enough evidence left to piece together the original design. Most of the install has been straight forward and one remaining original section survived on the curved wall of the dining room.... but the parlor curved wall didn't fare to well. It was ripped out and nailed above the dining room baseboard to serve as a nailer when the dining room window seat was ripped out and boxed in with panelling. It was too far messed up to be put back plus the ends were cut shorter so I would have to add pieces anyway.

So how do you get a 1 inch thick piece of oak that you can't even nail into to form into a curved wall and then actually stay there?? Well first of all I didn't have anything long enough (about 14 ft.) to do in one piece so I milled two 8 ft. long sections. Using the radial arm saw I made a series of kerf cuts about every inch or so half way through the board. This will give the board some place to compress and allow it to bend easier. It was still tough to bend now but at least doable. To form it to the wall I would need to use some bracing to hold in place and slowly work it into the curve. So I wouldn't have several hundred holes in the floor I screwed some boards in to the floors and then screwed my braces into these as I worked the baseboard - so all the holes would be in these and the floor would end up with just two holes at each brace.


Over two days I was able to get the board tight against the wall and then mist the board a few times a day for several days to help "warp" the board. Finally I was able to nail it which ended up being just as hard as bending itself because the walls are stone and there are no studs, just furring strips which don't have much meat to them for the nail to bite to. After this side was done I repeated the same procedure with the second section. After finish sanding and staining it came out pretty good - maybe not up to the quality of the one piece original that was once there - but I'm sure I'll be the only one to notice.


.... all I can say is thank goodness the other original curved section is still there!

Tuesday, October 9, 2007

Busy Times

Progress continues, but not much time to post lately. Was promoted to a tech position at work, which means no more shift work! But adjusting to working normal 5 days a week and new responsibilities.

Continued milling and installing baseboard on the first floor. I have two rooms and the stairs milled with one room to go. The foyer and stairs are installed and stained, presently working on the dining room and bending the pieces for the parlor curved wall. Finally installing the outlets which I'm mounting in the baseboards as original so hopefully will get to fire them up soon and stop using extension cords for the first floor. Will go into detail with pics next time.

Finally the tile arrived for the parlor fireplace and have it installed - just needs to be grouted and can check off that project too.....


Sunday, September 30, 2007

Foyer Fireplace Home Stretch

While milling the wood work for the parlor fireplace, I went and made the pieces for this one as well. I needed to fill a gap around the opening of the mantel to the tile face using some basic square stock and then finished with a small piece of trim to cover some small gaps in the edge of the tiles that fell short of the trim I made. I gave the mantel a coat of "Aged Oak" gel stain and a satin poly finish. The finish coat revealed some nice tiger oak that I hadn't noticed when i stripped the old worn finish off the mantel down to bare wood. Just a little restoration work on the insert and this can be checked off the list too.


I continued running the chimney for the parlor fireplace from where I left off last year on the second floor master bedroom. I added three more 4 ft. sections and another fire stop between the 2nd and 3rd floors which puts me right at the slope of the roof. Unfortunately this is right in the middle of a dormer or I could keep going straight through. My next order will be for a 30 degree bend, another 4-6 ft of pipe and then 30 degrees back to vertical and hopefully through the roof behind the dormer and below the main hip.


2nd floor

3rd floor

should poke though the roof a feet below that ridge beam (top of hip roof)

Saturday, September 29, 2007

Birth of a Mantel

Haven't been posting as much lately, but still quite busy - just not as noteworthy. A nasty head cold didn't help much either! I left off with the basic wood work complete on the parlor fireplace and next thing to do was make a mantel.

I started from lumber pile and using some old 12" wide barn boards cut three pieces a bit over sized for the front and sides. After running through the joiner to get a clean edge I ran all three through the planer till I came up with a nice milled finish. This ended up around 7/8" thick. Next I ripped all three down to 8" wide and then on the outside edge ran them through the router to add a bead detail.


rough cut barn boards - precut for mantel sections

running through the planer

freshly milled 200 year old red oak - nice!


I ripped some 2x4's at a 45 degree angle and anchored to the wall above the 1x6 trim. This added some good support to mount the mantel pieces and will get covered over with some crown trim.


To add the crown molding I first milled some 1" square trim to step out the bottom of the crown and give an added detail to the design. This also made the mantel overhang seem less extreme (only about 4 inches now). Finally a little filler and finish sanding, a nice coat of stain (Minwax Gel "Aged Oak") and a satin finish coat. Add mantel clock, some nick nacks, and enjoy.....


Just waiting on the tile now.....

Saturday, September 22, 2007

Back To The Inside

After a year sitting unfinished, the wood stove project is picking up steam again and I hope to get some free heat outta this baby come winter. Up to this point the main structure was framed out and covered in 1/2" cement board, but that was the extent of it. First thing to get sorted out was a hearth and hearth extension. The hearth extension I decided on slate and was able to find two pieces of slate - one about 3/4" thick which I hoped would do the job but it only gave me 2" past the front of the stove and code is 16". So I found the 2nd piece which added another 16" out and this was 1 1/2" thick. Using a diamond blade the slate cut much easier than anticipated, so getting them sized up was no sweat. Under the thinner piece I added 1/2" cement board and 1/8" metal shims that got me spot on with the other piece of slate.


The firebox hearth I used self leveling cement which I poured until even with the slate. I used 1/2" cement board under this as well. The final results came out great and could pass as being original to the house.

Next was installing a brick veneer on the walls of the firebox that I finished framing in and installing cement board for a base. I found these at Lowes for 50 cents/piece. I installed these using 3/8" tile spacers which gave me enough gap to point the brick.


When these set for a few days I did the hearth pour and then came time to point them with mortar. This was my first crack at doing this but watching John do my footers I picked up enough technique to do it. It's definitely tedious and probably harder to do with an uneven face (these veneers are quite random in thickness and rough edges), but the result is pretty good and this will be blocked by the chimney and stove anyway. I then dropped the stove back in place and adjusted the height of the chimney and it is now in place permanently! My back couldn't take too much more moving this 400 pound beast....

is it brick..... or is it??


I finally settled on a tile, a 4"x4" reproduction art & crafts tile which go well with the room colors - and my budget. The sample of 8 came which I installed and then put in an order for the rest. Having this settled I could then concentrate on starting the wood work. I had a general idea for a design inspired by some others I've seen and the fireplace in the other house I almost bought. It will be arts & crafts influenced like the rest of the house but a bit watered down since there are other influences to the design of the house.

Of course I didn't just go to the store and buy oak boards.... first I had to make them! This project will add a little more learning curve to my experience with the new tools I picked up in prep for reproducing all the missing wood work. I started out with 1/2" oak plywood base on the side which will be framed out 3" on the sides and 6" on top and bottom. The front will get 4 1/2" sides and a 6" top, all being 1" stock. The vertical pieces I milled from old door jambs taken out of the house - to far gone to be cleaned up into usable jambs again but enough to use here and keep as much original oak in the house as possible. The horizontal pieces were milled from my stock of rough sawed red oak. I've never worked with wood this hard before and I'm thinking this may have been an old growth tree the came down and was sawed up. The grain is real tight too. I even had to pre-drill for nails because they kept bending! So even if the original wood is gone at least old wood is going back in.


I added a small piece of accent trim on the bottom edge of the top 1x6 that wraps around to tie things together a bit. Next I have to mill wood for a mantel and add a crown under that. I would have went with brackets but since the mantel wraps around, it would have looked odd with no support under the mantel on the sides.