Friday, March 30, 2007

A Picture's Worth A Thousand Words

..... And one awful smell!


Life has not been pleasant this week at the old Hall house. A minor backup problem that started in January is now 99% blocked up. I tried to finally get it cleaned out with a snake from work. Well we managed to get 60 feet in, which got to within 10 feet of the sidewalk. After some detective work with my neighbor's metal detector, I found the front vent buried about 6 inches down. Today we tried cleaning from that end, no easy feet with a normal T connection 4 feet down.


But it appears that between the vent and maybe 5 feet or so back is packed solid - years of rental neglect I'm sure. But spring outage season is upon me at work - a.k.a work 70+ hours a week (electric company does all their maintenance work in spring and fall when demand is low). So looks like I will have to call in for the first time ever - a pro.... profess.... professional - that wasn't so hard! Still it is a sad day to throw in the towel on a challenge, but clean wash and showers would be nice without flooding the back yard. I have 4 days in this already and definitely would take many more hours with my setup to get things flowing again - and this just can't wait any longer.


On a positive note, the stained glass window is finished and back in place. The jamb and trim were scraped, filled, and primed. The glass was installed in the frame and glazed. This was my first attempt at glazing and yes it is as hard as you think and heard. Definitely a bit of a learning curve to get the feel for cutting in the glazing. All in all I'm very happy with the results. After two weeks for the glazing to set I can paint it up.


Wednesday, March 28, 2007

Getting The Stains Out Of Stained Glass

With the window disassembled, I started experimenting with ways to get the glass cleaned up. The outside surface which is smooth, I was able to get away with a glass scraper for the paint and remaining glazing. But to get off 100 years of baked in crud, I used 0000 steel wool and alcohol. This did the trick and really started to bring the color back. And now doesn't have that gritty feel. For the inside surface, which is textured, I had to use stripper. I spread some thick gel stripper on the surface and let sit for 10 minutes. Then did a good scrubbing with a nylon bristle brush. I wiped up the goo with more 0000 steel wool, then went over with some alcohol and a good cleaning.

Before cleaning

After cleaning

Closeup

The frame was a real PIA. I started with a paint scraper for the loose stuff (outside part) Then tried stripper, and ended up with the paint gun and a final sanding. The inside, which had seen shellac, then white paint, then poorly stripped and coated with varnish. I went with stripper and steel wool for two application. Then went to the heat gun again to get the remaining material out of the grills which you could no longer make out the details because of all the layers of stuff.


Frame all cleaned up


After sanding, the outside was primed and inside where the glass sits. The inside I went with an "aged oak" gel stain. The trim and jamb in the house is oak, but the frame is pine. I quickly was reminded that pine doesn't cooperate with stains and it came out blotchy. So after some sanding and a coat of treatment for soft woods that helps even how the wood absorbs the stain, and then two coats of stain, it's about as good as it's gonna get. Two coats of clear satin poly and it's ready for the glass.


Monday, March 26, 2007

...And Still Another Side Project

With windows on order for the downstairs and hopefully installed around May - I figured I might as well get started on the one remaining original window in the house. The stained glass window on the landing of the staircase certainly has seen better days, but with a little luck and lots of patience, it will once again be a focal point of the stairs.


Originally it swung out, hinged on the top, but this was long ago caulked and sealed shut. Getting it out proved to be not a big deal, and just by luck I had a piece of scrap plywood that fit the opening without cutting... with that kind of fortune I'm just bound to break a pane of glass! Once inside I could do a good inspection. No real structural issues, just a few coats of glazing (a few too many!) and paint that was already half off. Inside was originally stained, later painted white, then stripped poorly, and then some finish put on. No care was used in not getting any stain, stripper, etc. on the panes so these will need some work to clean up. The inside of the panes are textured making this even more of a pain.


Outside

Inside

I tried using a toy I bought a few years back to remove glazing. It attaches to a drill, and has a handle with a built in guide. You're supposed to walk it along after setting the depth on the tool and it should just cut out the glazing without damaging the window. Well maybe it was all the glazing but it just road on top and had no real control. So I gave up on that and just used patience, a 5-1 painters tool, and a light touch with a hammer. In the end I managed to get all the glass out intact. Next step, stripping everything down....


Closeup of paint and glazing condition

Sunday, March 25, 2007

More Mud and Side Projects to Side Projects

Three coats are now up and waiting to sand - now where did that motivation go?? This weather has been on the humid side and the coats are slow to dry thoroughly. Hopefully another week till primer (translation: two weeks and a day).


In between waiting for coats of spackle to dry and days that you refuse to even say the word, one can never have too many side projects going on. Here is just a sample.

I started working on creating a template for recreating the wrap around window seat in the dining room. This was all but destroyed by the PO's when converting to apartments. There were two pieces left (the ends) that were cut flush with the kickout that supports the seat. The middle section was gone. I was able to use these as a guide to get the right curve and I measured the imprint on the side walls for the depth before the plaster walls were gutted. I also took a few measurements and tried sitting on different depths to see what was most comfortable, but still practical for the space. The walls are 15 inches and the seat depth ended up being 13 1/2 which is what gives the flattening to the curve at the ends. This is my best guess to what was originally here. Next step will be planing and joining some 1x12 oak boards to transfer the template to - I'll need to make (2) 2 ft. x 4 ft. pieces for the ends and (1) 2 ft. x 6 ft. for the center section. Coming to a blog near you - later this summer.


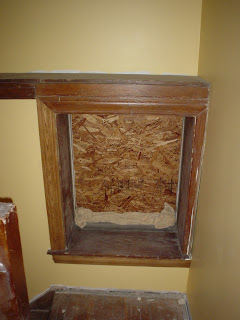
Also the salvaged fireplace mantel in the foyer has some new gingerbread on it that was missing. The center had what was left of a wreath design applied and around this center section was a beaded trim that was half gone. These pieces were the best available for the spot and turned out nice. I found these at Van Dyke's Restorers.


Friday, March 23, 2007

Scenes From The Hall Family Visit

Here are a few pics Russ sent me from the recent Hall family visit - first time back in over 45 years. Hope to see everyone again soon along with some of the other members we didn't get to meet yet.


In other news - the mudding continues in the dining room, working on 3rd coat. Should have pics soon.

Wednesday, March 21, 2007

Goodbye Stairwell

Here are the final result of the stairwell - in color. I'm SO glad that's done!


Also notice that most of the staircase woodwork has been removed. This was quite tedious and nerve racking, but will make stripping and getting into all the nooks and crannies much easier. The spindles came out by using a scraper held flat against it to smack a hammer with out doing damage against the travel of the nail holding it place. This worked really well and all came out with no damage. The top spindles had to come out anyway near the top of the stairs so I could mud the wall behind them. Stripping all of this should be a fun project later in the year. (Note sarcasm)

Monday, March 19, 2007

Stairwell Almost Finished

I thought I would never finish, but after a few weeks, and a lot of procrastination, I was able to get the stairwell finished and in primer. I won't go into too much detail, mainly because I think I've blocked most of it out! Definitely not work for the faint of heart or with poor balance. I think having the big Hall visit gave me the final push to get it done and now I'm happy to move on - should make the dining room seem like a piece a cake.


In the end it came out pretty well

Saturday, March 17, 2007

Is it St. Patty's Day or X-mas???

Woke up to several inches of sleet this morning - will spring ever come????! I guess they say nature is a mother....

After two hours of chopping, it softened up enough to finally break in my new snow blower. I've waited 5 years to get one, and every storm so far has been ice - which doesn't agree to well with a snow blower. Well Damnit today I was gonna use it even if it road on top of the stuff, but it did OK. The arms can't take this and drywall finishing - so much for making much progress this weekend.

You might be an old house owner....

... if you keep your snow blower in your dining room!

I was gonna take a pic of the house but figured this one that was just discovered looked much better than it does now.


Hall House about 1940

Friday, March 16, 2007

Foyer Fireplace Change-up

After the discovery of the foyer fireplace, much thought has been given on exactly how it looked. There was not much to go by other than the green tile, a hole for a gas line, and a brick fireplace that was obviously covered by something. I found a nice oak mantel that fit like a glove, and initially bought an original Humphrey Radiantfire to sit in the fireplace. But it just didn't look right. After more study and several opinions it was clear that a full gas insert covered that cavity, and probably tile (one of the Hall family members was able to confirm this) the same green as the hearth formed a surround - so the hunt was on once again....

Well, here is what I came up with. Found this beauty on EBAY (of course), and got it for a good price. It is a gas, radiant insert in good condition - just need to get radiants for it. I may restore it to operating condition, but most likely will just get a cosmetic job.


And here it is with the salvaged mantel stripped and installed. Brick veneer will cover the old brick until someday - maybe - I can find some matching salvaged tile.


Thursday, March 15, 2007

Rebuilding A Jamb

So what's one to do when your oak door jamb to your dining room has been converted from a nice 5 panel door to two saloon style 1970's bling doors complete with SKOAL bumper sticker on the glass - and in the process mortised 2 more sets of hinges on each side???!!!
Well you merely pry the jamb apart (carefully), pray the other sides are clean, and reinstall them with the inside out - nice new virgin (and original) oak. The casing molding covers the mortised part that is now on the inside.


Side pieces are removed from jamb

Top piece stays in place and stripped revealing original red oak

Sides are flipped, sanded, and reinstalled.


Door stops are stripped and reinstalled covering most of the nail holes. Cut, strip, and install some original casing you found being used as shim scrap under 1970's panelling - and you're in business! Not sure if I'll install a door here or not as was original - how do I know - well 100 years ago the builder left a note under the jamb which side the door was hinged and which way it swung!

Wednesday, March 14, 2007

Beginning The Stairwell


Gizzy inspects that the make-shift scaffolding meets OSHA standards before beginning the stairwell spackling.

Tuesday, March 13, 2007

Add One To The Spring To Do List

Well a bit of concern and a little probing has yielded some serious troubles. Apparently the "newly replaced" columns aren't what they're cracked up to be. I always thought the bases were a bit crude looking, and one day thought I would use the old screwdriver probe to make sure things were OK - well guess what?! This weekend I decided to check all of them more thoroughly and found a second bad base, but worse I found the columns itself was starting to rot too - yikes! Apparently they were not installed right. The bottoms were probably not painted and they are sitting directly on the concrete pedestal. There should be a moisture buffer. So after a bit of research and a few prices I placed my order today with Pacific Columns for 5 new FIBERGLASS columns. I was able to get all 5 delivered to my door for just shy of $800 - not as bad as I though it would be. They should get here in about 4 weeks.... stay tuned.


The only positive is that the columns the PO installed were not the right size which bugged me a bit. These are 8 inch dia. and the originals were 10 inch. It doesn't sound like much, but you can see the outline on the pedestal where the original was. And looking at them with the entire porch, the scale just ain't right. Looking at the old photos with the originals, they just tie everything together better. It's kinda like using 2 inch casing moulding and 4 inch baseboards in a room with 9-10 foot ceiling - it just don't look right. So now I have an excuse to make them right.

Monday, March 12, 2007

The Foyer - Now In Color

For those bored by all the recent old photo finds, here is the anticipated foyer in all it's yellow glory. Definitely more of a challenge than the parlor, the final results still came out pretty well. Of course the house looked liked a bakery when the sanding was done, since there is no real way to seal this area off from the rest of the house.


all sanded and ready to prime


The color is a bit more muted than the pics show (more of an Arts & Crafts shade) As if this wasn't fun enough, the next stop on the mud crawl is an even bigger challenge - the staircase! No shortage of angles here either and the best part is doing it 12 feet in the air.... with no net. Should be fun.

Saturday, March 10, 2007

Return of the "Halls"

Today after more than 45 years, members of the Hall family were once again roaming around these walls and it was quite a homecoming! What a time we had hearing all the old stories and filling in some missing pieces, and going through a treasure trove of old photographs that I was able to scan. They seemed quite grateful of our lapse into insanity in taking on restoring a piece of their heritage - and in the end been made honorary "Hall". Hopefully later in the year some of the more distant members can make a visit.

The following two pics are probably the "jackpot" of picture finds - these are the front and back of the house taken probably around 1912-1914 and shows how the house would have looked when new. Notice that the road is still dirt!


For all that came to visit today - Thanks Again!!