Tuesday, October 14, 2008

Electric Service Remount

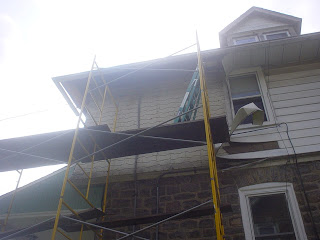
As talked about before, the bracket for my electric drop appeared to have ripped out at some point and reattached - but not to a stud. Tearing off the layers of siding revealed just how poorly attached it was. I removed the siding except what was under the bracket and then started hanging the new siding. Once I was sided up to the next nearest stud towards the front of the house, I was able to make the switch to a new bracket.


old bracket


I pre-drilled and threaded in the new reinforced ceramic bracket. Next I hooked on a new tension clip to the bracket. Then laying the bracket on the guide cable (also the neutral wire for the service drop) I slid in the tapered mating piece. As tension is applied to the bracket, the pulls the taper closer making a tighter grip to the cable. It's a simple and really reliable design. Once the new mounting was complete I was able to remove the old bracket and the siding underneath it. Fair warning though, extreme caution needs to be taken when working around a service. One bad move can leave you a toasty critter and there is no breaker out on the street lines to blow if you do short something out! Usually the wire, the tool, or you will become the failing point to break the circuit if something bad happens.


I still need to put a service weather head on the cable. Right now it just has a "gooseneck" head, where they just bend the cable over to keep water from getting in the cable where the sheathing is cut to expose the individual leads. A weather head has a mounting screw and keeps the top of your cable more secure.

Sunday, October 5, 2008

Running Out Of Time

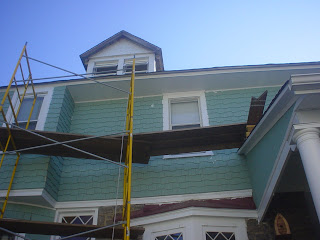
My work schedule gets crazy again starting Oct 25th, so basically I have till then to get as much done on this side as I can. After that it will be pretty much dark when I get home (and probably won't feel like doing much!). The corner is stripped down and papered, plus the belt trim is stripped - so now I can start to shingle the corner and get the front finished. I started yesterday and have three rows done up to the porch roof along the side. The next level will start wrapping around the front. I have a few batches done so we'll see how far I get today, but the limiting factor on time again will be how fast I can get more batches painted....


I ran into a problem with the service cable. It appears that at some point in the past it was ripped off the house and then remounted about 6 inches away. The problem is they didn't his a stud! As I started prying hoping to work some of the siding out from behind it and be able to leave it in place - the entire bracket started moving - yikes. So I just worked around it for now leaving it everything in place. The sheathing is pretty thick, but with all the material between the bracket and the sheathing I don't think it grabbed to much wood. So my electrician buddy told me a trick to switch the triplex (wires coming from the pole) to a new bracket without having take on the full weight of it. It's a good 100 feet run to the pole, so I doubt I'd be able to hold on very long let alone try to fish onto a new bracket. I get into this more when I actually do it.
Another issue I had to finally deal with was a 1 1/2 inch conduit run that went from the service panel, up the outside wall along the service cable, then down along the belt trim and poke into the house in the from bedroom and the back bedroom/2nd floor kitchen. There were 5 circuits total which had to be disconnected from the main panel and pulled back to where they went back into the house on the second floor. Then I was able to remove all the ugly conduit. Two circuits were dedicated to outlets probably for window AC units, so I just eliminated them. Three others feed the third floor which was semi redone before I bought the house. Two of these seemed to power most of what I'm using up there, so I temporarily made a junction box in the front bedroom and powered these two a new feed I ran to power the front bedrooms. When these rooms are gutted I can run the lines up to the third floor and to the closet where the central AC will be and a sub panel.

Sunday, September 28, 2008

Finally Back

Before leaving for vacation, I was able to finish up the soffit around the corner, add the crown detail, and do final painting. It's tied things together pretty well.


Back from vacation I built scaffolding around the corner so I can make my way around the final side of the house. Once again another colony was nested in the soffit which made for a fun tear down. It's a little more tricky here with the electric service which would not mix well with aluminum siding if I nicked a wire! The old soffit and aluminum tear down is finished, so next will be getting the old shakes down and working the corner with new - if the weather cooperates. I think we brought the English weather back with us.....


And just to make you all feel better about your own "not square" homes - check out "The Crooked House of Windsor". The pic doesn't do justice for just how crooked this house was!


Saturday, September 6, 2008

3rd Floor Unveiling

Well..... Here it is! Got the scaffold down just in time for tropical storm Hanna's arrival.


Now it's back to finish up the 2nd floor.

Wednesday, September 3, 2008

Enjoy The View While It Lasts

It won't be long now before I come back down to "safer" heights....


Over the past week I managed to get all the stripping done, repaired the window sill and trim, finished all the shingles and beadboard - basically you can stick a fork in it except for the finish painting. That should be complete tomorrow. The bead board I've been using so far once again worked good in this application. Once I caulked everything in, it tied together great.


Hopefully the scaffolding will be down by the weekend and I can really appreciate the work.

Tuesday, August 26, 2008

More Pics - And More Progress

As promised - a few more detailed pics of work written about in previous post.


The reproduction windows

New crown flares out starter course for 3rd story

New composite bead board sistered over original

Today I installed the drip edge and fitted the crown molding. It was a bit tough sneaking it under the shingles, but with the help of a pry bar I managed. The crown was another challenge working with 12 foot pieces by myself. I ended up cracking one before deciding to just temporarily screw in place to get fitted, then predrill and nail when it's all fitted in place. I'll just have to fill a few holes - no biggie. The crown really cleans up this section and now its ready for final paint. I do need to sneak in one more row just before the shingles run up the rafter. Checking my photos of the originals, they ran these rows closer to the transition than I thought.


Drip edge and crown installed along roof line

Monday, August 25, 2008

3rd Story Progress

This weekend with some help from John I managed to get a good jump on the 3rd floor work. While I started rebuilding the crown that flares out the shingles on this level, John removed the pair of replacement double hung windows and prepped for the installation of the reproduction set. With the crown rebuilt I added the starter course and finished papering the sheathing in prep for the siding.

Next the bead board had to be dealt with in the "inset" area. I decided to go with the same material I've been using to replace the soffit. On the inital vertical sections I just mounted them right over the original since the new pieces are only a 1/4 inch thick. Once it starts the 45 degree angle under the roof I nailed 1x3 boards to use as a nailer and this will let them sit flat since nails are popping through from the asphalt shingles above. The beadboard can't be installed here yet until I strip the front rafters.

Back on the windows, they were made almost dead on perfect and just had to be tweaked because the opening were a little out of square. Once installed and opening freely, the next day John fabricated a new sill to match the originals. This he made from the pine bases I replaced under the radiators on the first floor. Finally stops were added with built in weather stripping. Brass hardware is on backorder at the moment. There is still an issue of making a screen - but I'll get into that later.


Next day I started installing the shingles on the outer section, getting as far as running up the rafters. I was sure to document how the old timers made the transitions, since there was a bit of thought and a few shingle hanging tricks that went into them (using thinner pieces, cutting layers at certain spots, etc).


Today I got the nerve to do the upper peak. I had an eyelet mounted to a piece of angle that my dad made for his roof job, and I was able to mount that to the house just above the double windows. I hooked my lanyard to this from my body harness I have from work - giving me just a little security.... especially up on a step latter on the top section of scaffold! Next step will be rebuilding the trim along the roof line, then the outer section can be finished painted. I'll take some better and more detailed pics this week.


Outer shingles finished

Sunday, August 24, 2008

Advanced Scaffold Building


Tuesday with the help of my buddy John, we managed to get the scaffolding built on top of the porch roof to access the 3rd floor front dormer. I played with a few ideas for the base, usually over complicating the matter...... but in the end, the adjustable feet had just enough to make it level. The upper feet I just used wedges. For the lower, I mounted to a 2x6 - which one edge rested on the roof and the other end was propped up with a 2x3. This made for a level base to fasten to. The bottom feet are also supported by 2x4's that run along the roof. I'll take a closeup later and add to this post. It's quite high up there for sure - but still not as bad as the chimney job!


All the woodwork up here has seen better days

Quite a view - about 45 feet from street level!

Saturday, August 16, 2008

Next Section Preview

I managed to get up to the third floor section and strip some aluminum siding to reveal the original shingles. It should look unique when finished, I've never seen a front like it. I plan on building at least one level of scaffold across the porch roof to work on it which I'm still kicking around some ideas in my head for supporting it. I might do a second level in the middle, but after working on the ladder, I think I could use a step ladder to reach the middle no problem.The rest should all be within easy reach since the planks should end up just where the third floor starts.


The middle section is starting to take shape and hopefully a few more batches should get it completed.


Here are the two windows that will go in the third floor. All the dormers originally had these style windows and will eventually be done with reproductions of the original design. The craftsman that made the windows for the foyer window seat made these for me and did a heck of a job. This time at least he had a sample to work with, which was removed from the house and used to fill a busted window in the garage.


You can see the originals in a closeup from a picture taken around 1940. I still can't believe how lucky I was to find all the original photos I have - what a big help they've been!


Tuesday, August 12, 2008

Second Side Wrap-Up

FINALLY - the second side is totally finished with the siding and soffit. The end result looks fantastic and was worth the endless hours of painting shingles. But, I still have a long way to go.


I've already done a third of the front, which gives me a jump on the third side. In between some wicked storms this weekend I managed to get the center section stripped, flashed, and papered and then today I installed the starter and first course. Now it's back to making more batches of shingles again.....


I pretty much finished landscaping the driveway side as well complete with birdbath, sundial, and Rach added a gnome for good measure! There's at least 15 different plants along here which should really take shape next year. All I need to do still is add some sand and set the slate pavers permanently.


Wednesday, August 6, 2008

Sweating Along

It's been pretty consistent near or in the 90's for several weeks now, which making for slow progress. This side is just about wrapping up and I should hopefully have the scaffold down by the end of the week after some final painting. To finish the soffit, once again I had to add bracing between the rafter tails and add a nailer along the wall. I had one rafter end that was so bad it needed to be sistered on each side in order to support the soffit and crown fascia. Other than that it was more of the same.


I think after the front I may finish the front 3rd floor peak before moving to the last side. I got the 2 windows for the 3rd floor last week which came out really nice. I'll post some pics next time. This is the dude who made the pair for the foyer window seat. The other 5 dormer windows will be made next winter since I won't be tackling them till next year.

Sunday, July 27, 2008

Side Two Finished

It's been a hot struggle with temps normally in the 90's - but the siding is now up on the second side of the house. Once I was above the roof line, installation was pretty routine. I ended up continuing around to the first window on the front of the house. That pretty much means the front is 1/3 done too.


I still have to do the soffit which needs some supports installed first and some rot damage repaired on the rafter tails. Then it will be a final paint on everything and I can finally wipe my hands of this side. I really need to take down the scaffolding soon so I can finish the landscaping....


Which lead me to the other project I've been dabbling at. I've been working on the landscaping on this side of the house as well. I bought a book for northeast plants and some landscaping ideas and eventually came up with a plan. I am by no means a garden expert, but i knew I didn't want just the same old plants you see every year at the local HD. The book was a big help in finding different plants that would work in our area and designing a layout that would have something in season all through the year. We'll see how it works out!
I found 44 blue stone pavers on craigslist so I could replace the concrete walk at a great price. I've also been rooting some plants I either found or were given to me and the rest either were bought locally or I picked up starter plant/seeds on EBAY. The mulch I get free from the township and the edging stone were free too. I get into more details of what's been planted when everything is finished....


The push to get this done now is because I have all kinds of plants started in pots that need to get rooted good in the ground before the cold comes. Other wise I will have to sink all the pots in the ground and dig them out in the spring.

Friday, July 11, 2008

Moving Towards The Front

I moved up to the front corner and stripped the old siding a little bit ahead of time so I could start flashing and get the starter course in where the porch roof meets the house. This is a tough area because of the corner and the angles of the roof along the wall. I pre-cut 6 foot sections and had them bent to 25 degrees. I learned my lesson on the back trying one long piece and trying to bend without using a brake.


I also don't have the luxury of having a bare roof this time since this roof was done recently....all though laid on top of another roof. This adds to the issues of laying the flashing on the roof. I worked the flashing into the shingles the best I could and will remove the top row and muck them down on top of the flashing. This should look OK and solve any of the leaking problems I've been having.


Next the starter course goes in along the roof line.


I need to finish wrapping, then I can finish the side shingles up to the roof, start the front and side corner a couple rows, and tie everything together when I get to the first uninterrupted row. And let's not forget - make a few more batches of shingles!

Monday, July 7, 2008

Another Eviction

Today I dismantled the soffit along the side and around to the front where it ends and the large 3rd floor dormer begins. In the front section I came across another Grackle village and promptly gave eviction notice!


This is the second Grackle condo now (there's more to come...) and I'm still playing leap frog with the sparrows as I move closer to the porch and they keep rebuilding - but I only have 2 feet to go before I have check mate on them.


This was before the Grackle condo dropped. I didn't even bother after, there was too much clean up to do.....